In this article, we will go over how to use the post editor to customize your posts.

#1: Save Button
Click the save button after making any changes or they won’t save.
#2: Post Name Field
By default, AIMI uses an internal post number as the name. If you want to change this edit the name and click “Save Button”.
#3: Trash Post
If you want to remove the post entirely from your calendar, click the “trash” button and confirm the removal.
#4: Date/Time
If you want to change the date or time of when a post is to be scheduled click the “Date/Time” button.
This will open our date picker and time selection menu. Make your changes and click “Set” then click “Save” to lock in the changes.
#5: Schedule Button
Click this button to schedule the post. Learn more about scheduling and un schedule here: How to Scheduled & Un Schedule posts
#6: Post Information
We give you information about the post here, including the calendar and campaign it is tied to and the scheduled date and time.
#7: Image Post Options
Click on either “Your Colors” or “Variations” to see the designs AIMI created for you. Or you can select the “Image Only” to post with just an image and no design.
#8: Post Image
This is the image that will be posted to your social networks with you schedule your post. Click the arrow icon in the corner to enlarge the image.
#9: Pagination
The next and previous buttons in the footer allow you to load the posts from your calendar in the editor without going back to your calendar first. This makes it easier to go through every post in your calendar, make edits then click schedule.
#10: AI Design Library (Replace Design)
If you don’t like the design AIMI created, click on the “swap” button to swap out the design for another. She will use the same image currently assigned, so if you don’t like the image, replace it as described below.
#11: Assigned Image Collections (Replace Image)
Use your mouse to scroll through the library and click “Swap Out” on the image you want to replace.
#12: My Uploads
You can upload a photo or pick an image from your uploads to replace it. Once you have found one click on the “Swap” button to replace the image in your post.
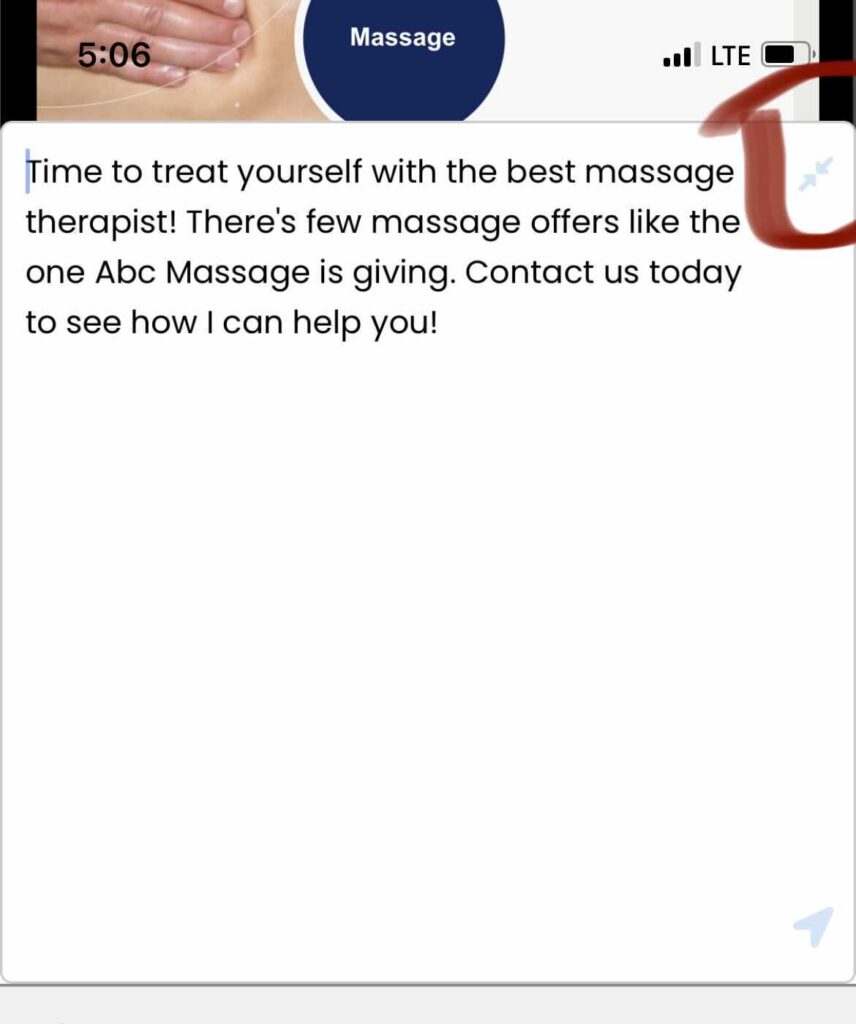
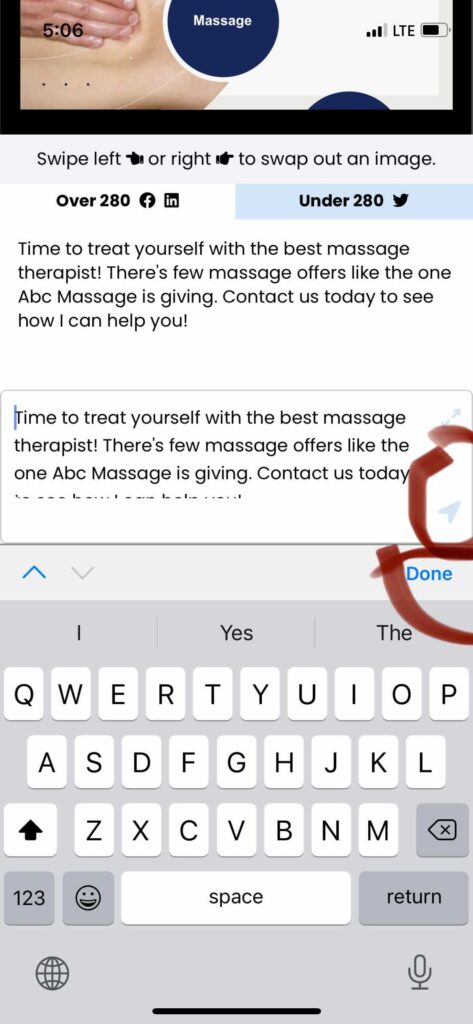
#13: Text Area
This is where you edit the text AIMI wrote for you for that post. Click on the text to open the text editor to make changes. Make any changes you want to make.
In this article, we will go over how to use the post editor to customize your posts.
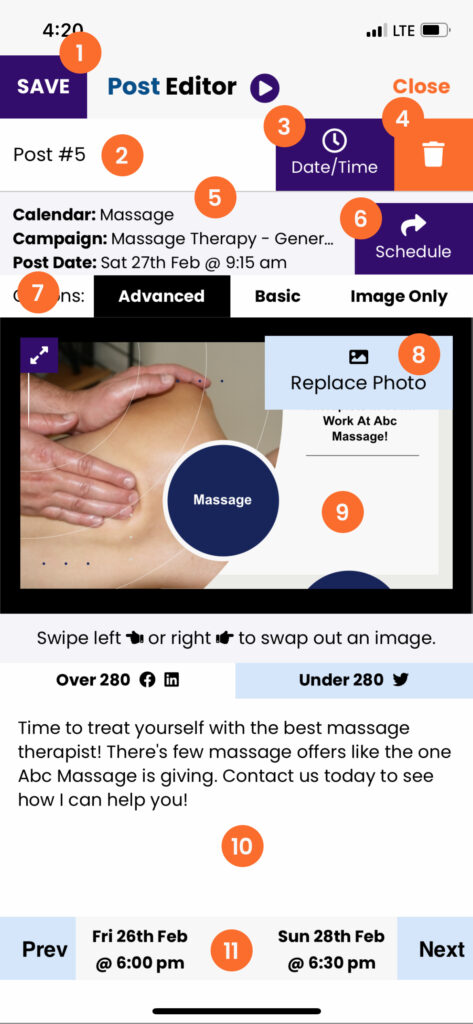
#1: Save Button
Click the save button after making any changes or they won’t save.
#2: Post Name Feild
By default, AIMI uses an internal post number as the name. If you want to change this edit the name and click “Save Button”.
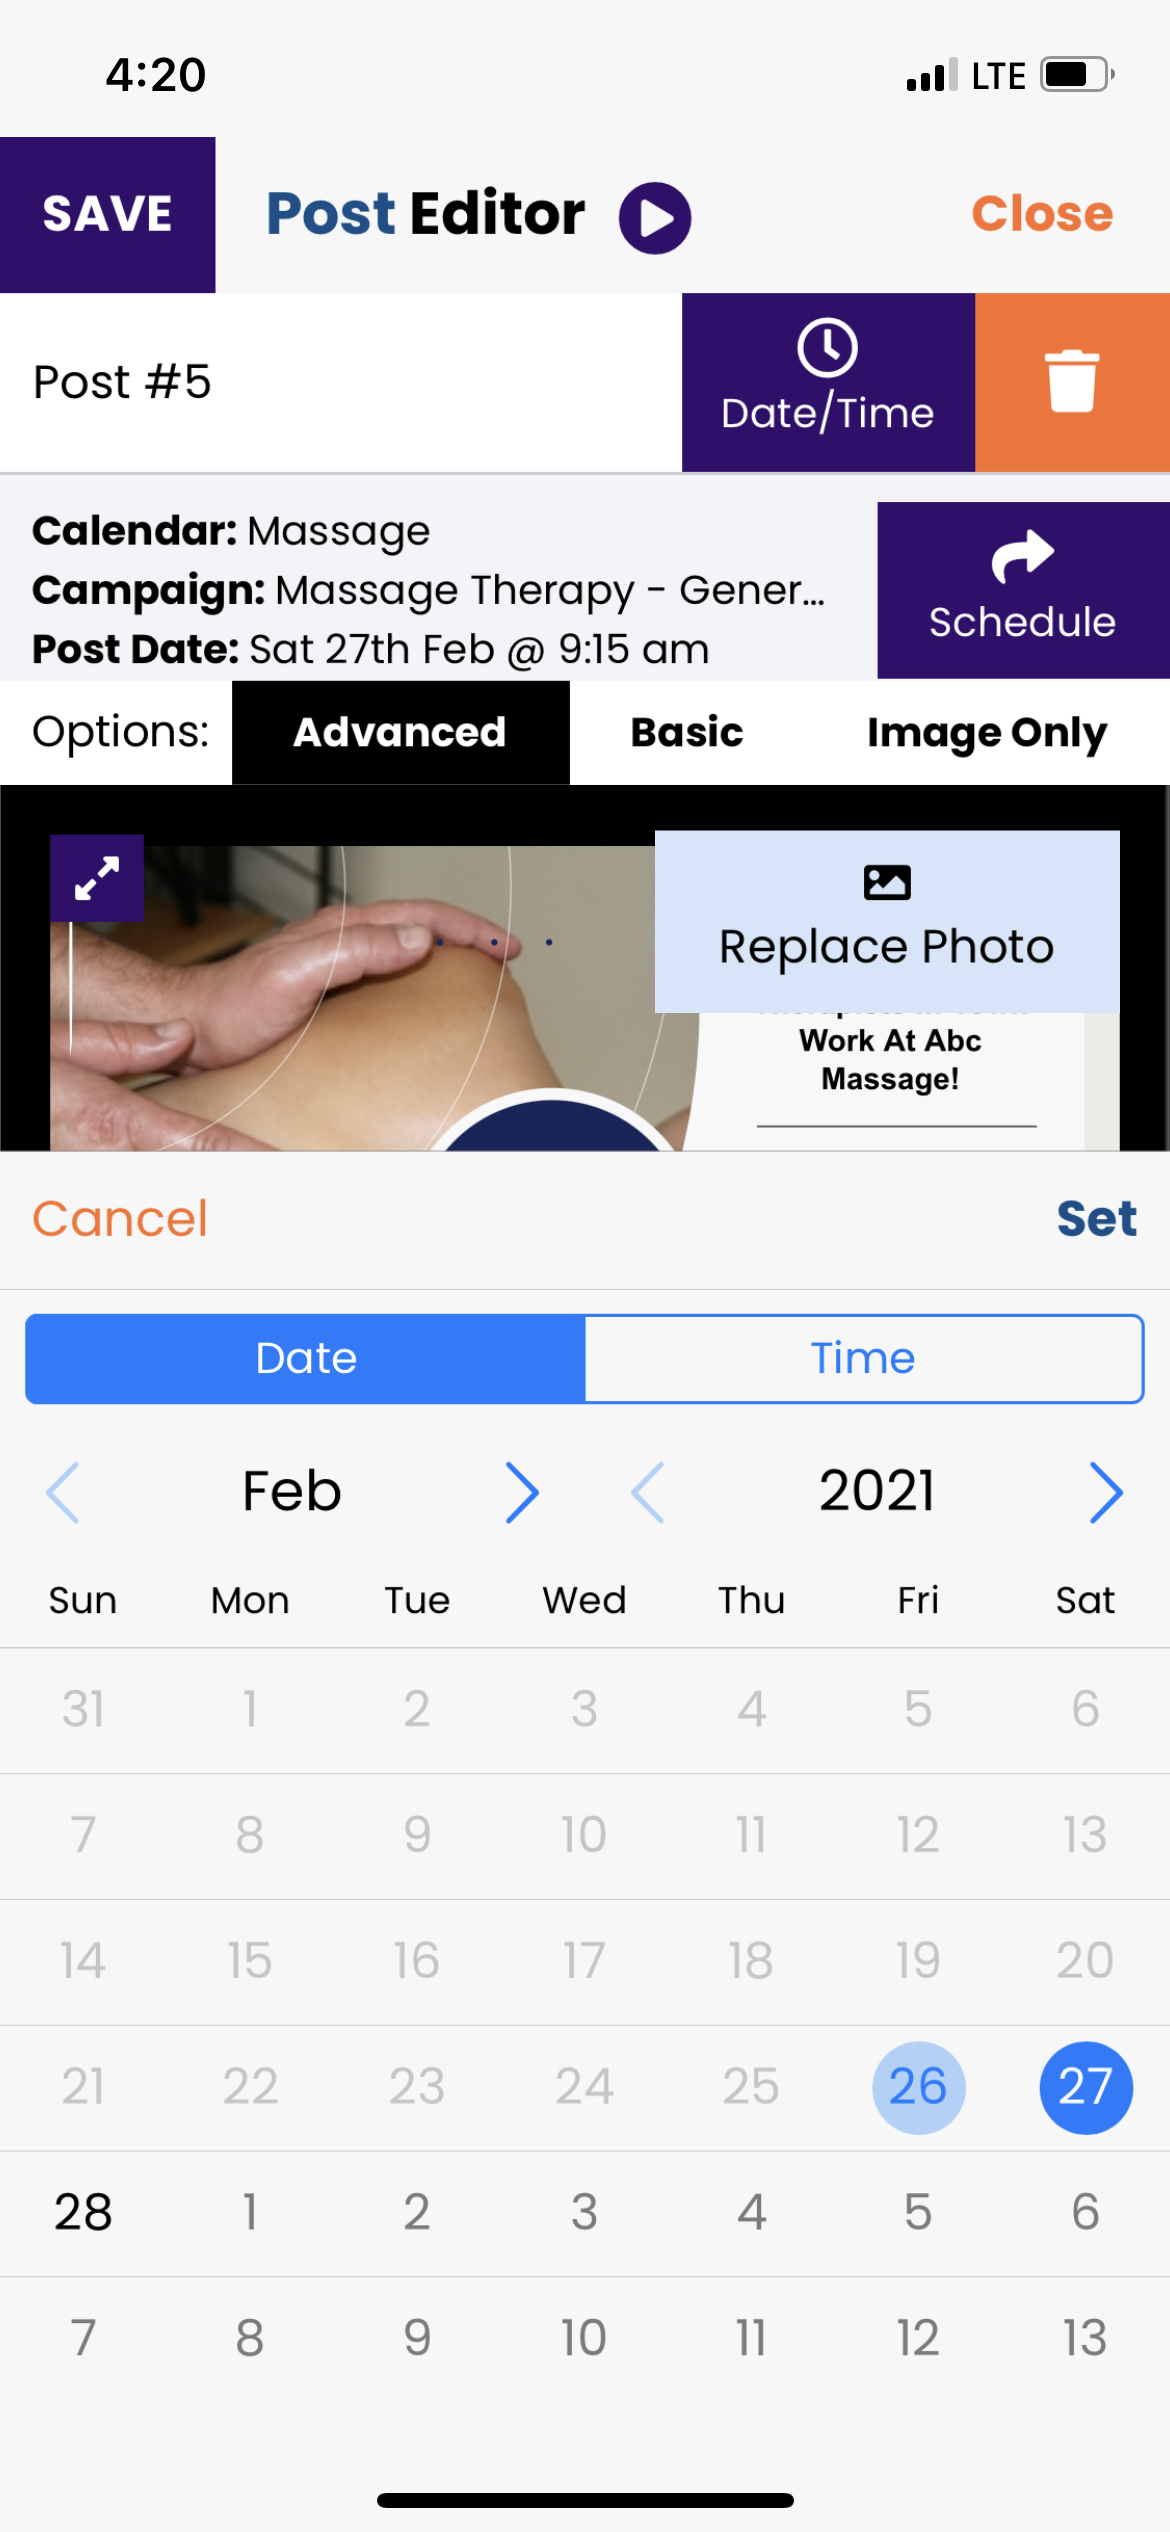
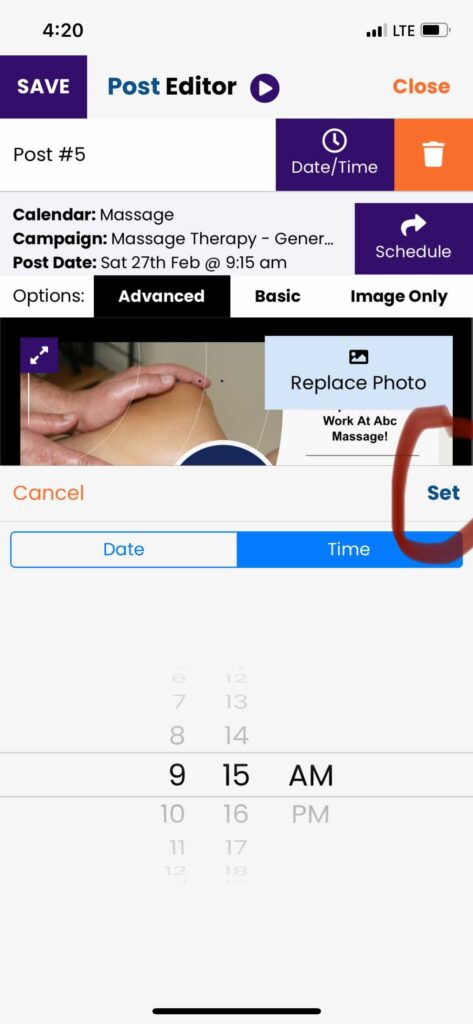
#3: Date/Time
If you want to change the date or time of when a post is to be scheduled click the “Date/Time” button.
This will open our date picker and time selection menu. Make your changes and click “Set” then click “Save” to lock in the changes.
#4: Trash Post
If you want to remove the post entirely from your calendar, click the “trash” button and confirm the removal.
#5: Post Information
We give you information about the post here, including the calendar and campaign it is tied to and the scheduled date and time.
#6: Schedule Button
Click this button to schedule the post. Learn more about scheduling and un schedule here: How to Scheduled & Un Schedule posts
#7: Image Post Options
Click on either “Advanced” or “Basic” to see the designs AIMI created for you. Or you can select the “Image Only” to post with just an image and no design.
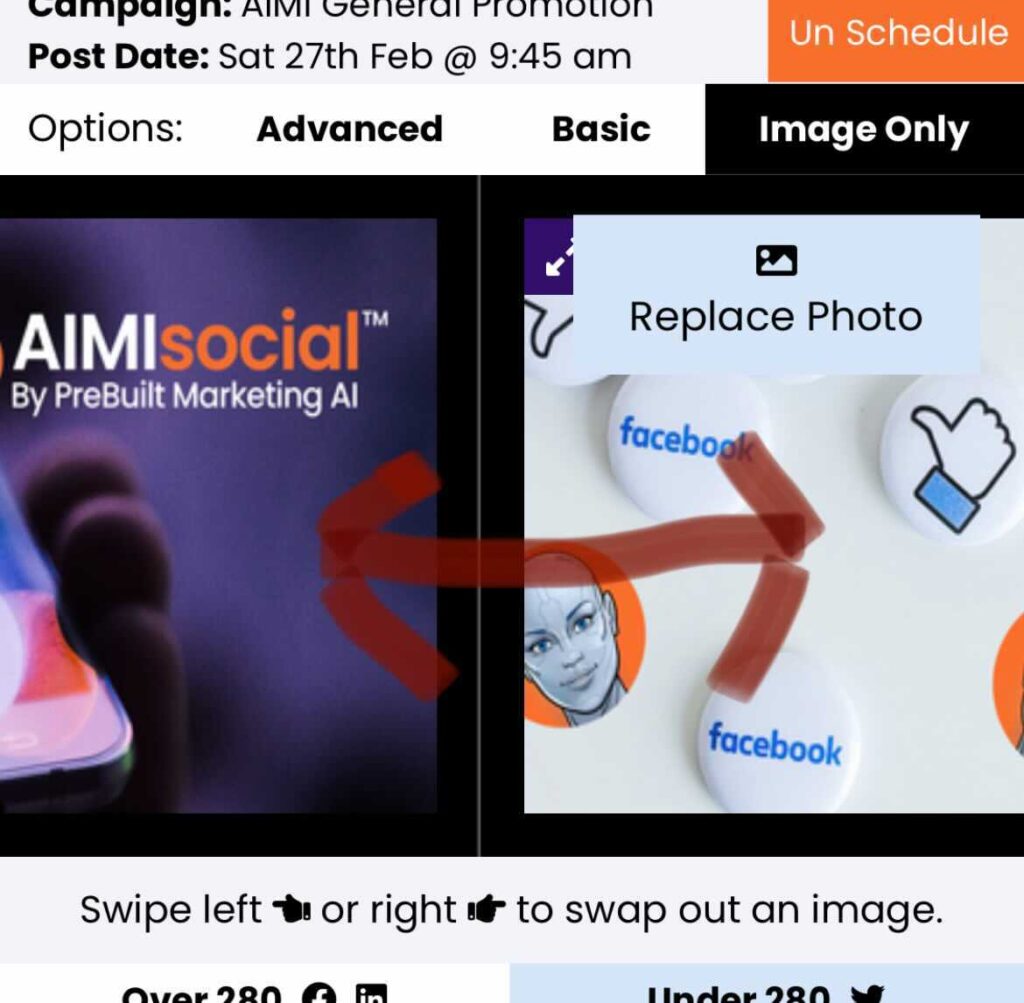
#8: Replace Photo
If you want to handpick and replace the photo that AIMI used for Advanced, Basic, and Image Only options then click the “Replace Photo” button.
When you click that option a menu will appear giving you the following options:
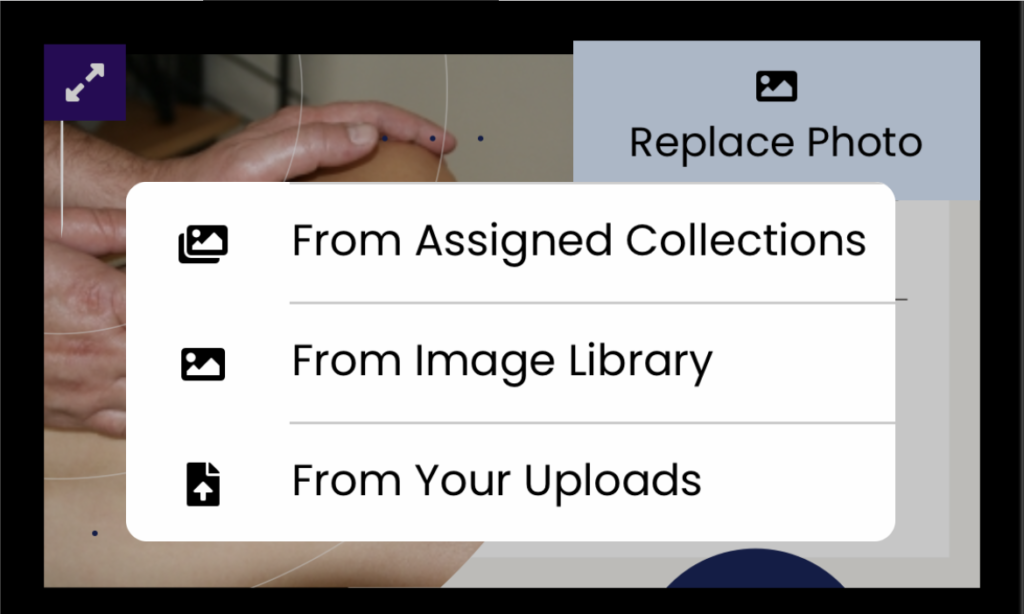
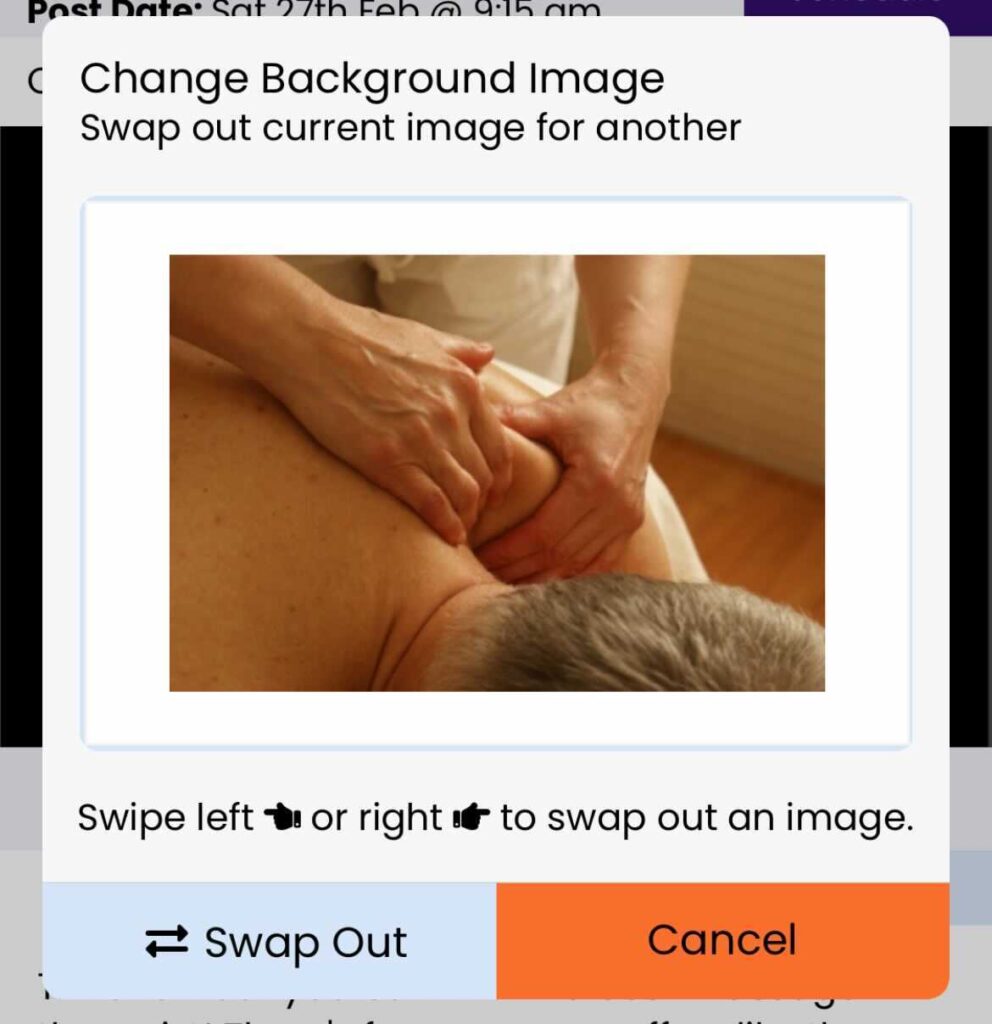
From Assigned Collections:
This will open a menu with all the images from the collections assigned to the campaign that the post was created from. Use your finger to swipe through the library and click “Swap Out” on the image you want to replace.
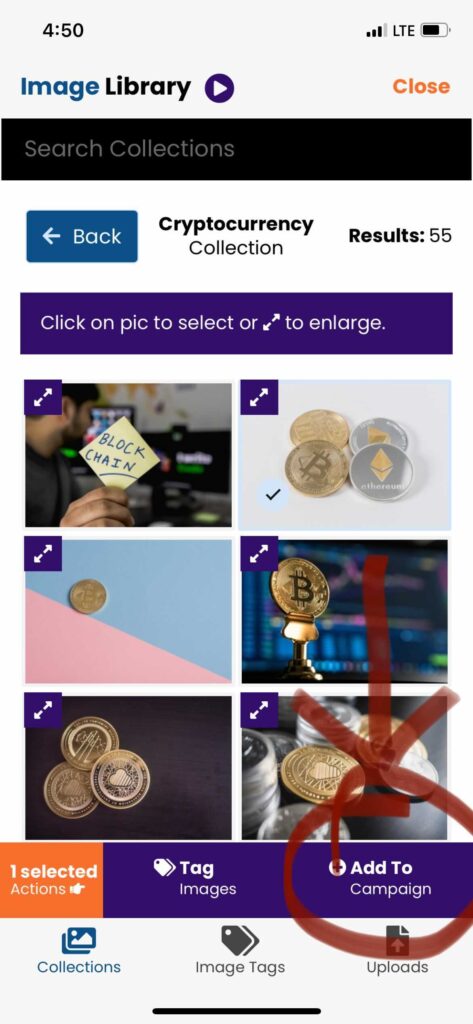
From Image Library:
This will open the Image Library and allow you to search all collections for an image to replace. Once you have found one click on the image to get the options menu, click “Add To Campaign”.
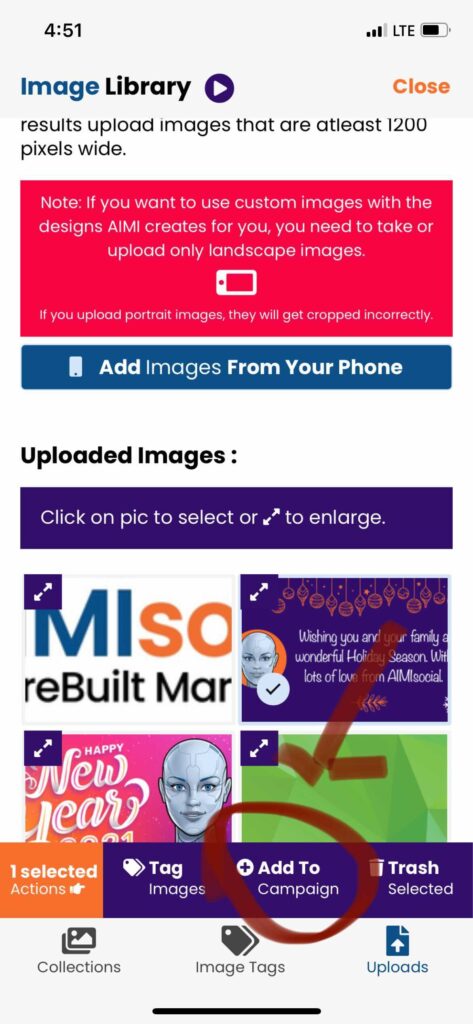
From Your Uploads
This will open the Image Library and take you to uploads. You can upload a photo or pick an image from your uploads to replace it. Once you have found one click on the image to get the options menu, click “Add To Campaign.”
#9: Post Card (Replace Design)
If you don’t like the design AIMI created, you can use your finger to slide left and right to swap out the design for another. She will use the same image currently assigned, so if you don’t like the image, replace it as described above.
#10: Text Area
This is where you edit the text AIMI wrote for you for that post. Click on the text to open the text editor to make changes. Make any changes you want to make.
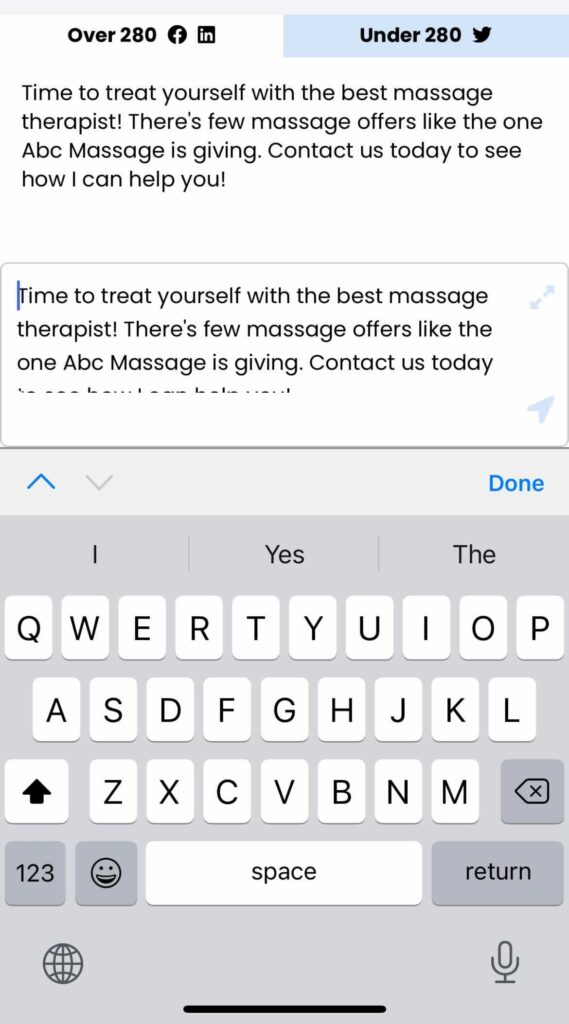
Click on the “Expand” icon to make the editor area larger.
When your edits are done click either the “Arrow” or “Done” Button. Make sure to click “Save” to finalize the changes.
#11: Pagination
The next and previous buttons in the footer allow you to load the posts from your calendar in the editor without going back to your calendar first. This makes it easier to go through every post in your calendar, make edits then click schedule.