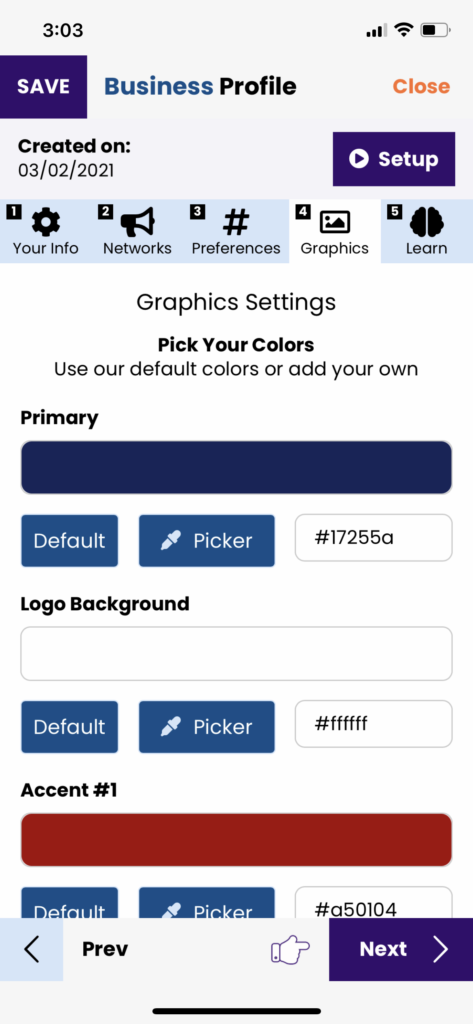
In this step, we will go over how you can manage the graphic elements AIMI uses when generating her post designs to match your brand.
Pick Your Colors
There are 5 colors for you to override:
– Primary: This color is the main color used in the designs and behind the text.
– Logo Background: This color is used behind your logo.
– Accent #1, #2, #3 & #4: Accent colors are colors that are used for emphasis in a color scheme. These colors can often be bold or vivid and are used sparingly, to emphasize, contrast or create rhythm.
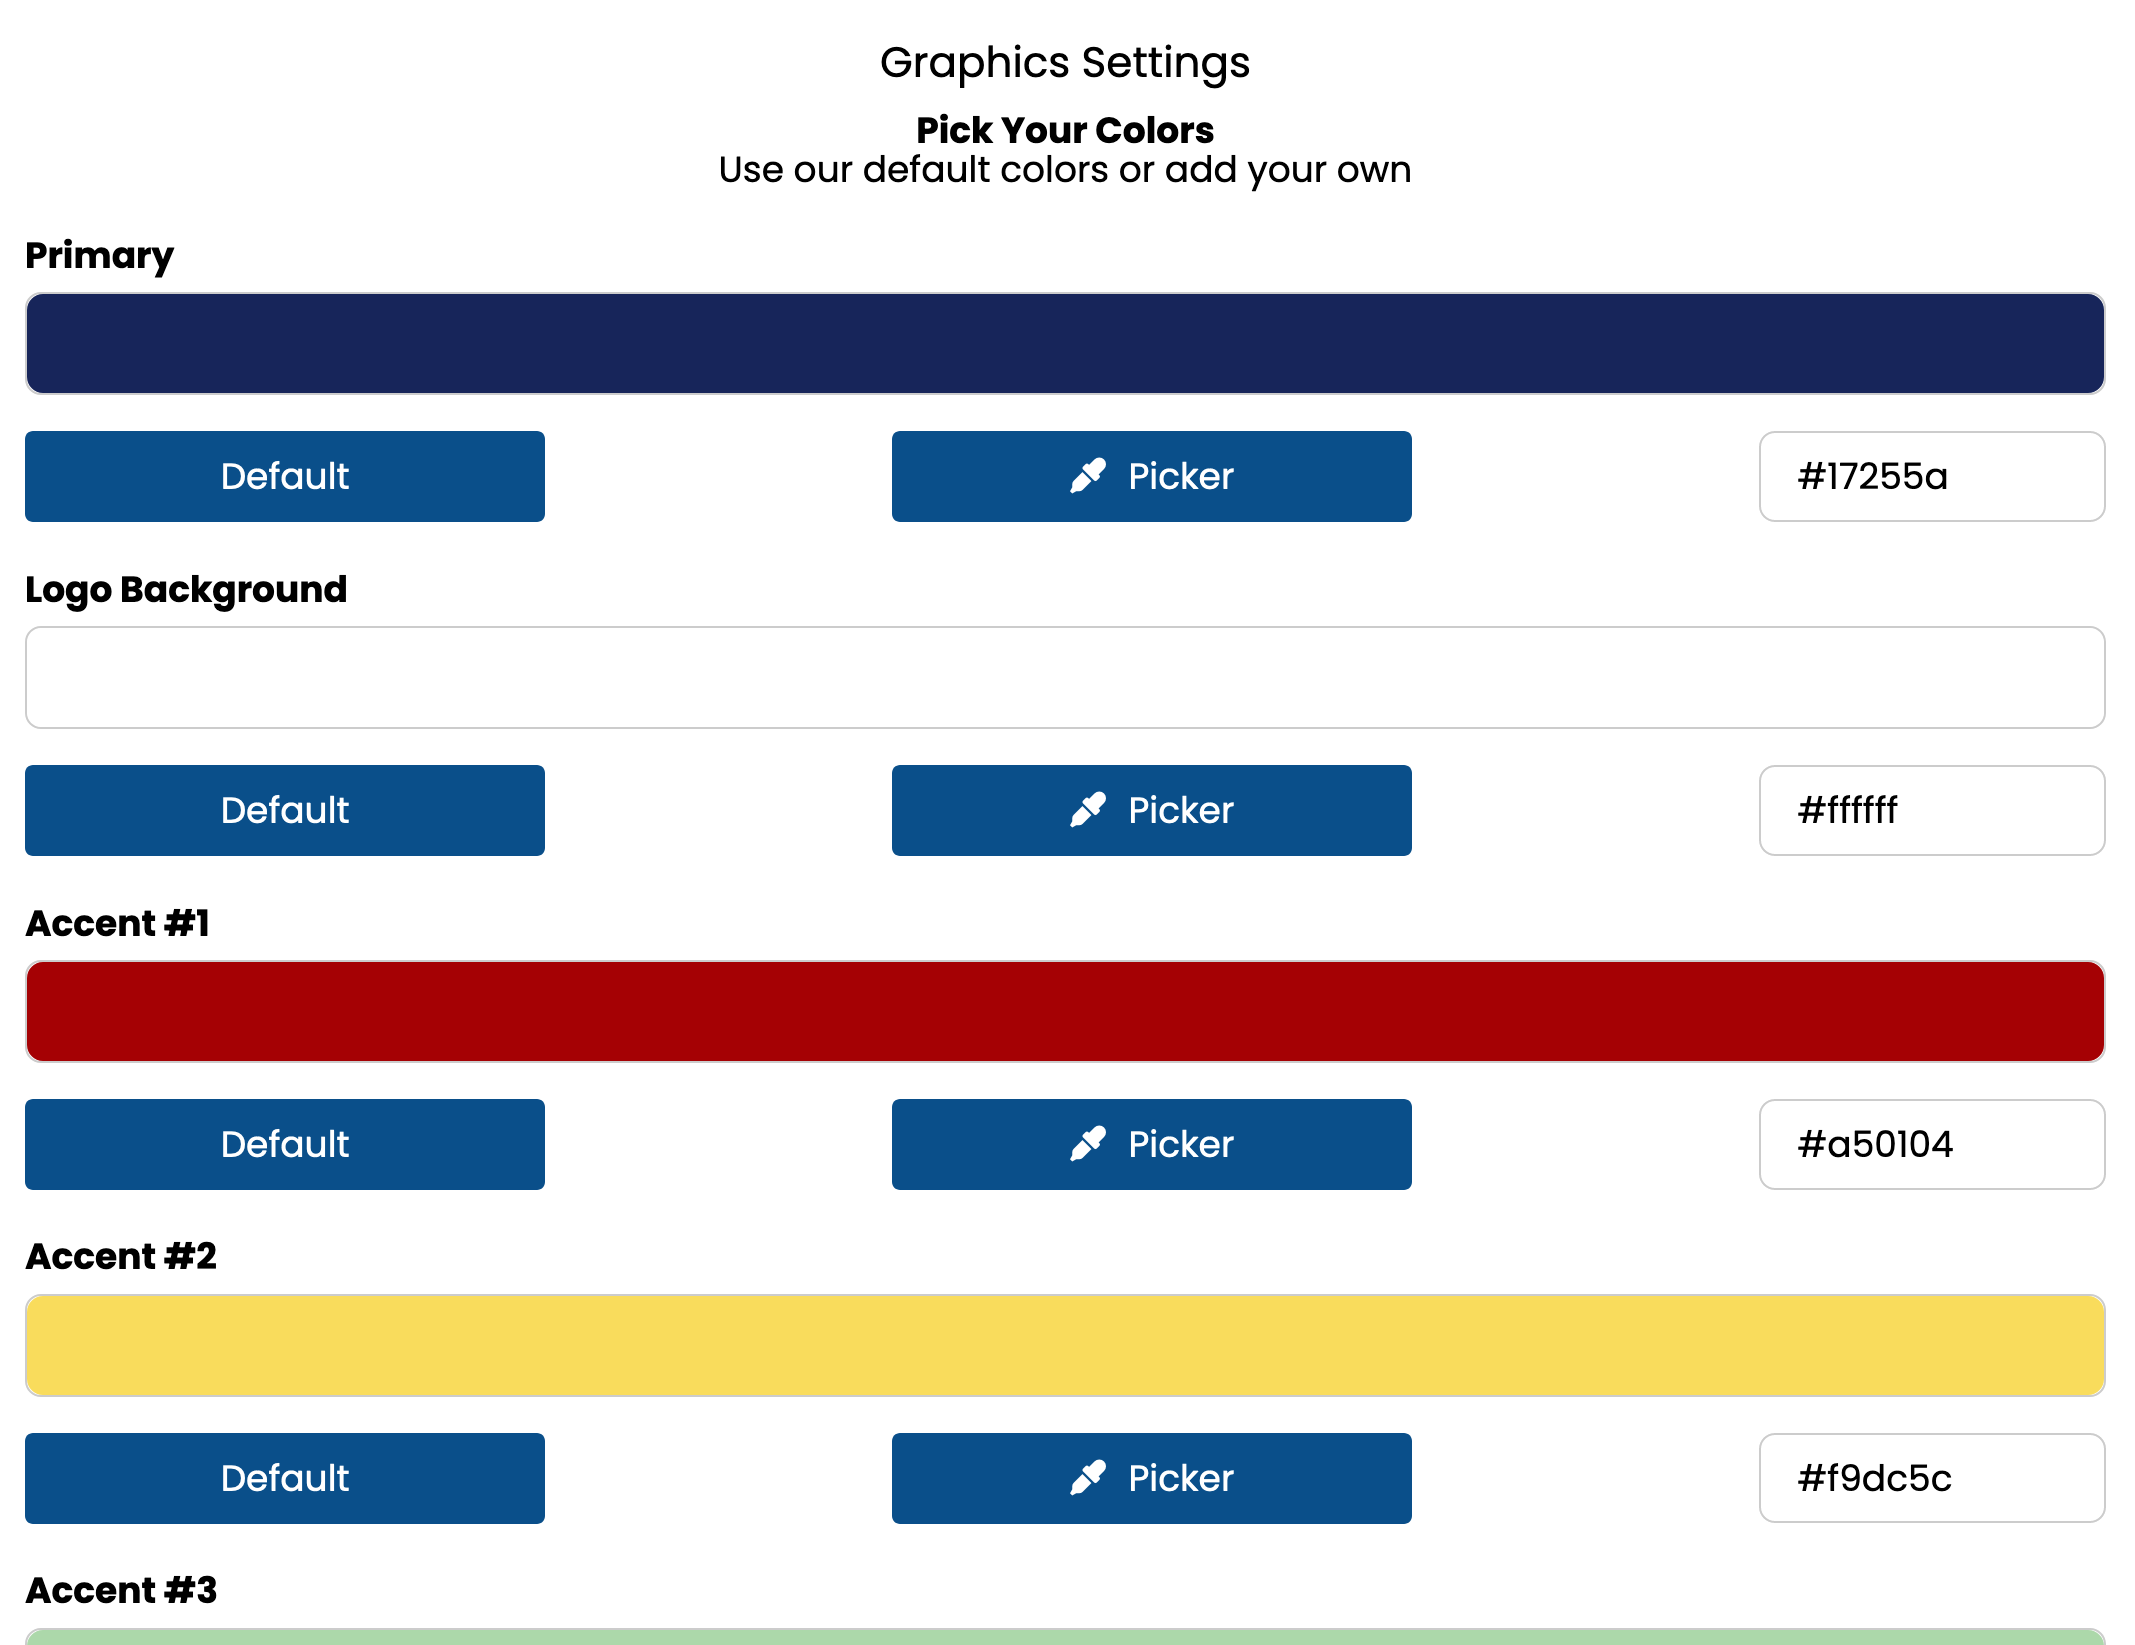
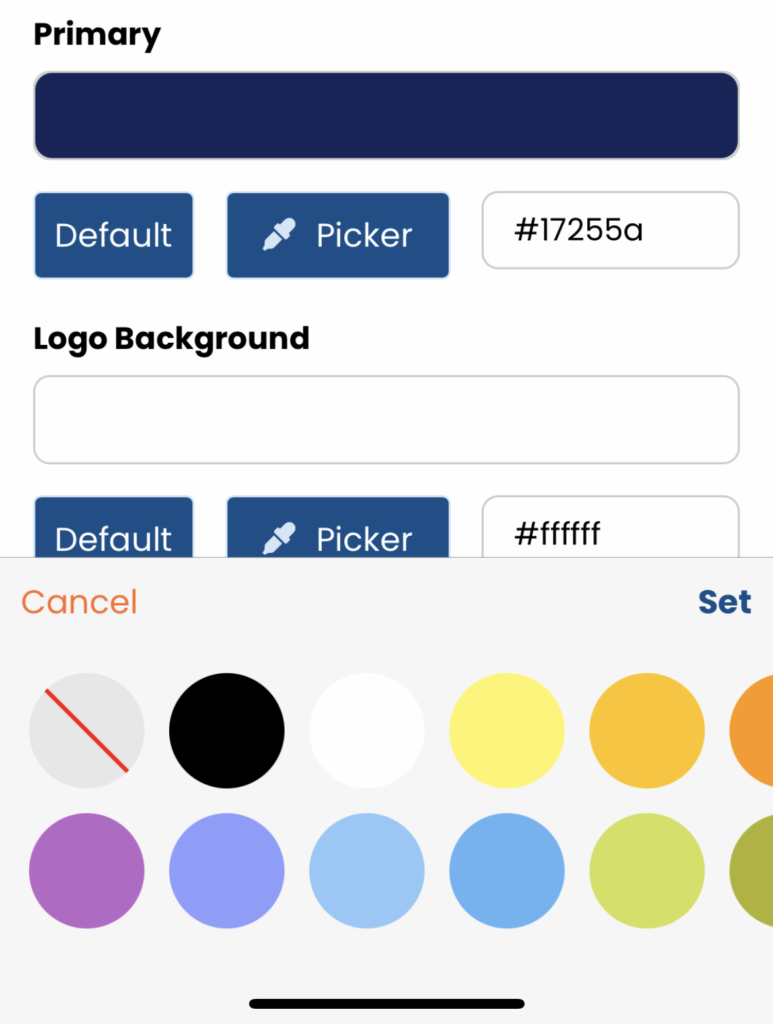
To make any changes to these colors, you can either change the HEX Color Code # or use our picker to select from a handful of pre-defined colors. You can go back to our default colors at any time by clicking the “default” button.
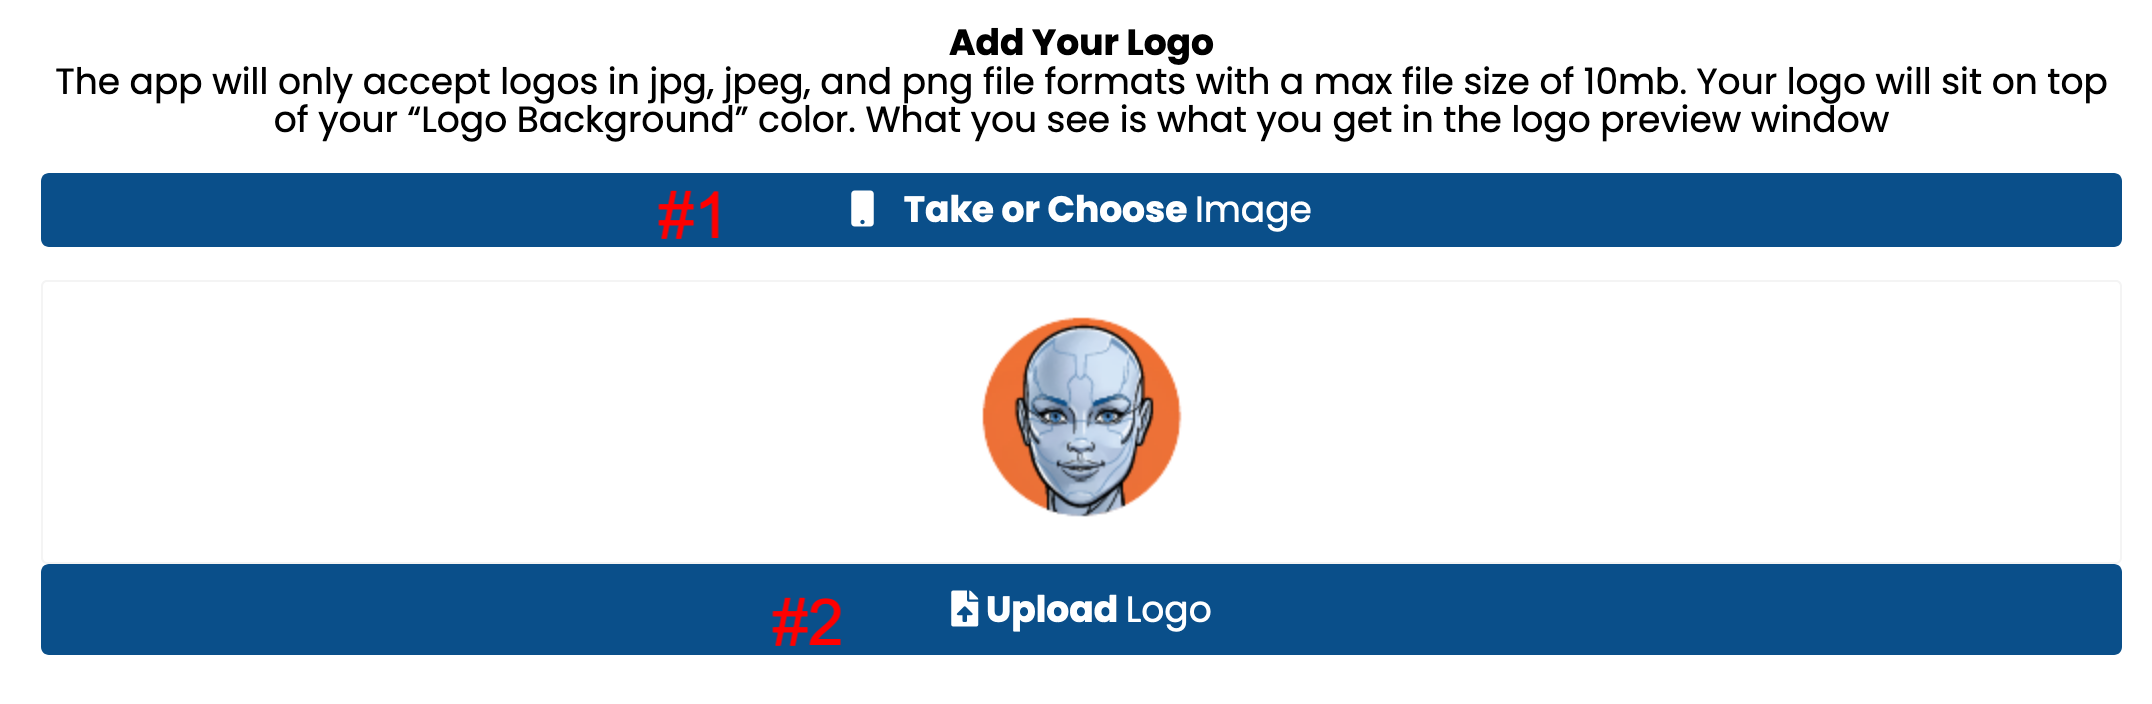
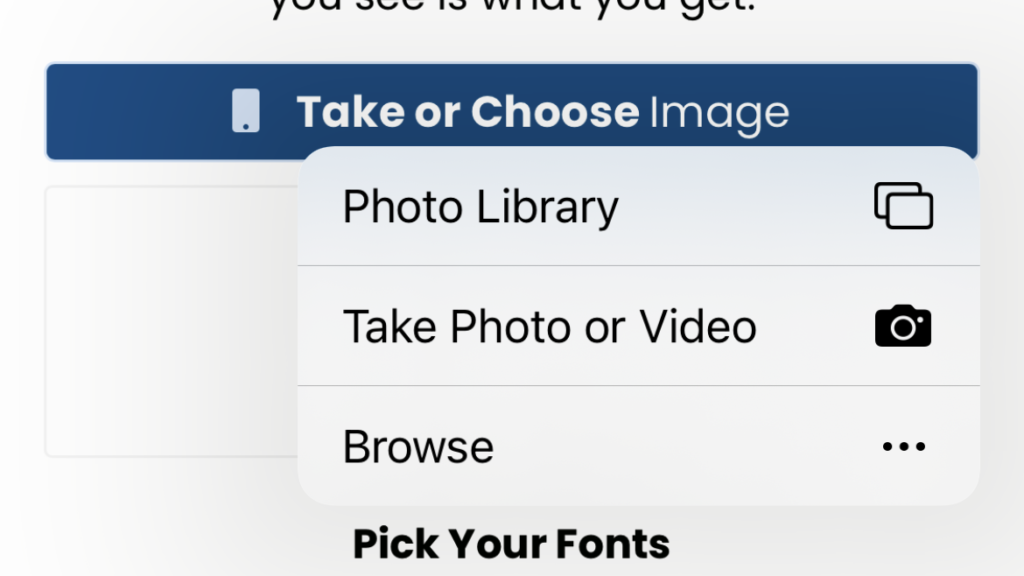
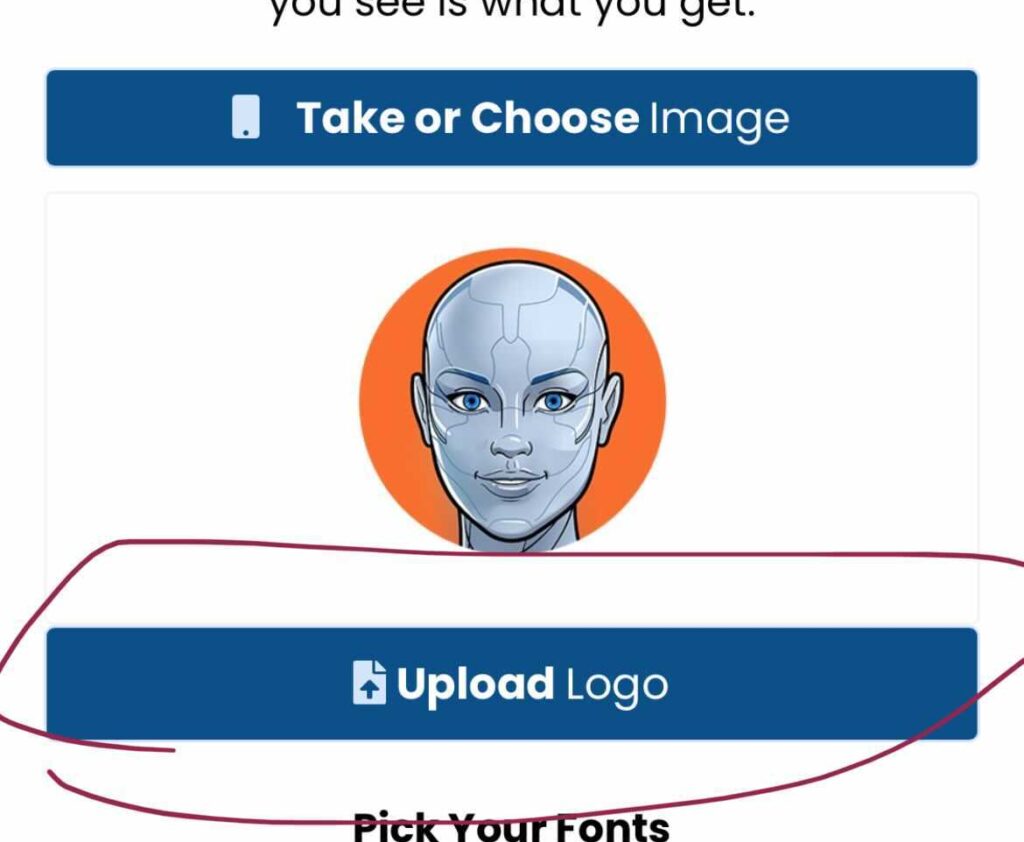
Add Your Logo
AIMI can strategically add your logo to most designs she creates for your posts.
To add a logo click on the button “Take or Choose Image”. Next, after you pick your file, it will load in the preview window. You must click the button “Upload Logo” to finish the process of uploading the file to the app.
You will know it has been uploaded once you see the green success message.
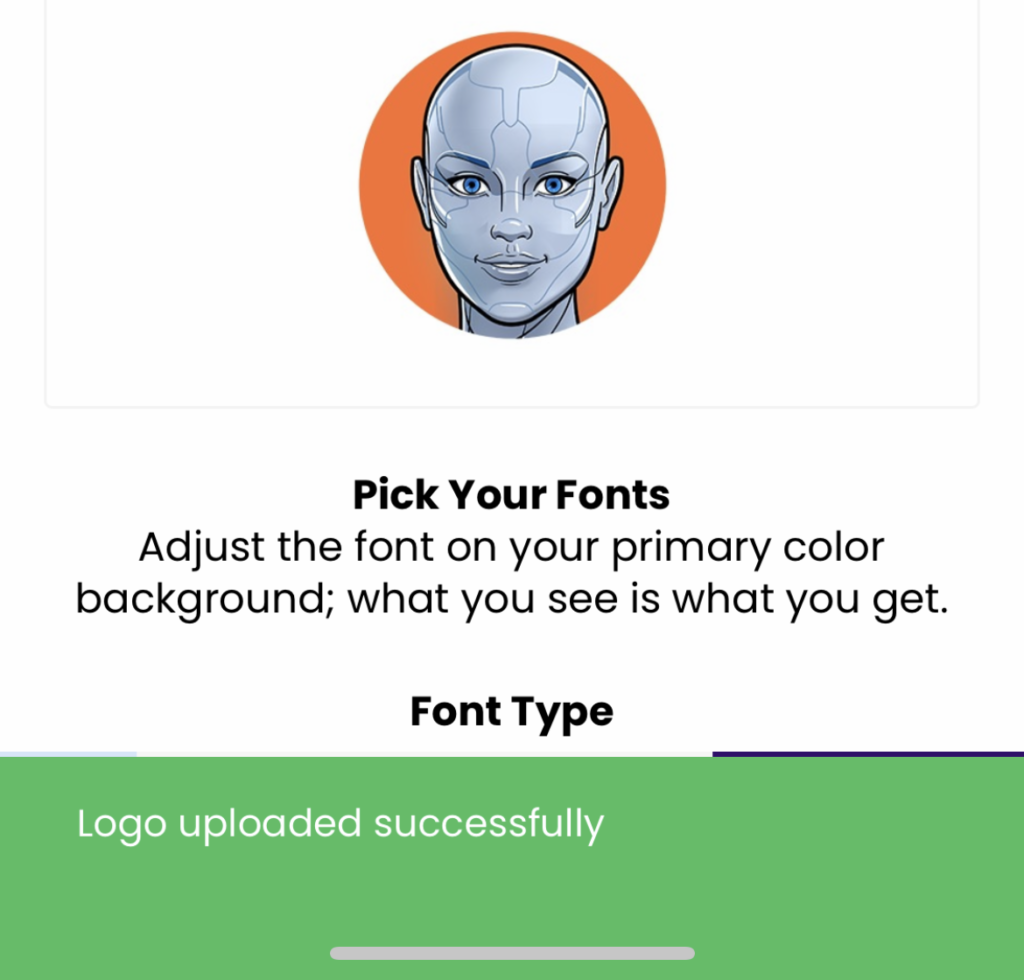
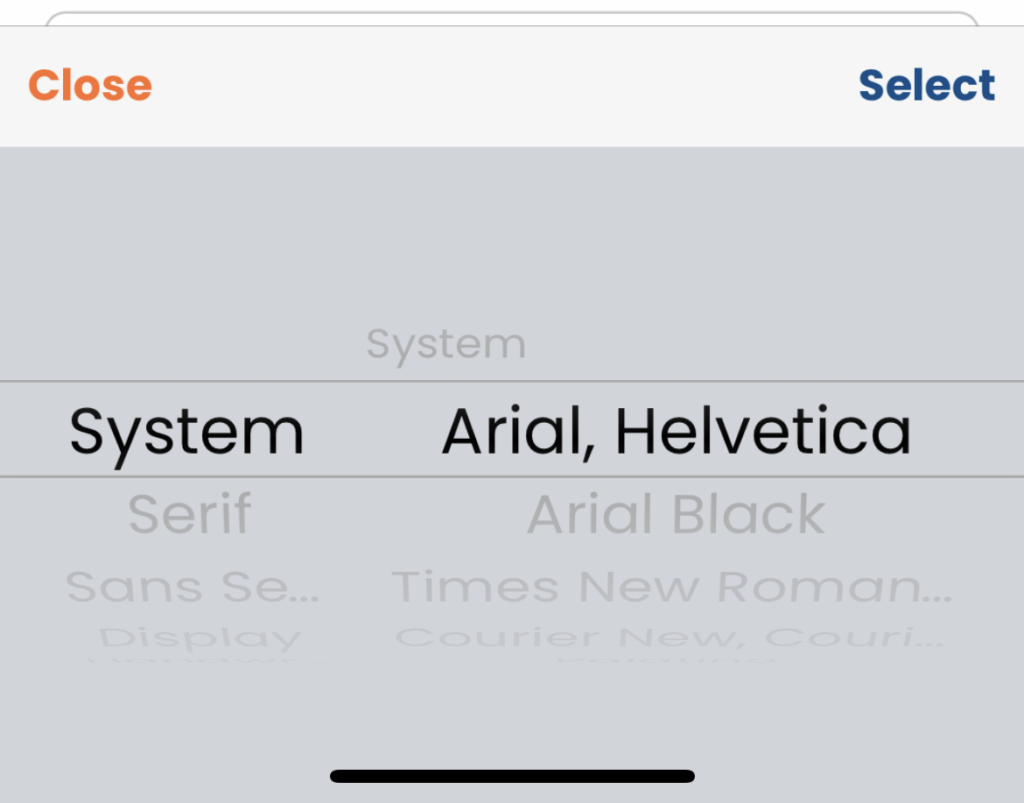
Pick Your Fonts
You can adjust the font type used in the designs to one of your choosing from our system and Google font library. Remember, fonts will appear on top of your primary color. What you see is what you get, as shown in the preview window.
![]()
Changing the font color works the same as described above. To change font type, click the font selector menu and pick from the list. We have grouped them into font-style categories for easy sorting. Once you have made your selections click “select” to switch out the font, the preview window will show you how the new font will look.
Next Step: Step #4 Learn – Business Profile
In this step, we will go over how you can manage the graphic elements AIMI uses when generating her post designs to match your brand.
Pick Your Colors
There are 5 colors for you to override:
– Primary: This color is the main color used in the designs and behind the text.
– Logo Background: This color is used behind your logo.
– Accent #1, #2, #3 & #4: Accent colors are colors that are used for emphasis in a color scheme. These colors can often be bold or vivid and are used sparingly, to emphasize, contrast or create rhythm.
To make any changes to these colors, you can either change the HEX Color Code # or use our picker to select from a handful of pre-defined colors. You can go back to our default colors at any time by clicking the “default” button.
Add Your Logo
AIMI can strategically add your logo to most designs she creates for your posts.
To add a logo click on the button “Take or Choose Image”.
Next, after you pick your file on your phone, it will load in the preview window. You must click the button “Upload Logo” to finish the process of uploading the file to the app.
You will know it has been uploaded once you see the green success message.
Pick Your Fonts
You can adjust the font type used in the designs to one of your choosing from our system and Google font library. Remember, fonts will appear on top of your primary color. What you see is what you get, as shown in the preview window.
![]()
Changing the font color works the same as described above. To change font type, click the font selector menu and pick from the list. We have grouped them into font-style categories for easy sorting. Once you have made your selections click “select” to switch out the font, the preview window will show you how the new font will look.
Next Step: Step #4 Learn – Business Profile