In this step, you can adjust the content options for AIMI to use in the campaign.
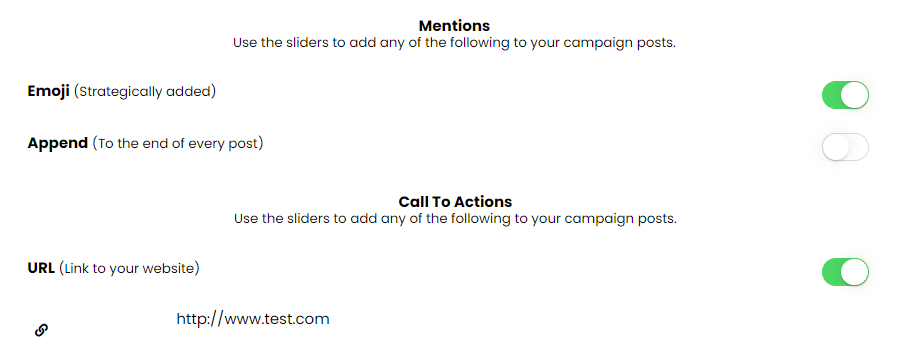
Mentions:
To use any of the options found on this page use your finger to slide the switch “On” green or “Off” gray.
Every category can have custom mention options depending on the marketing category you selected.
Default Mentions:
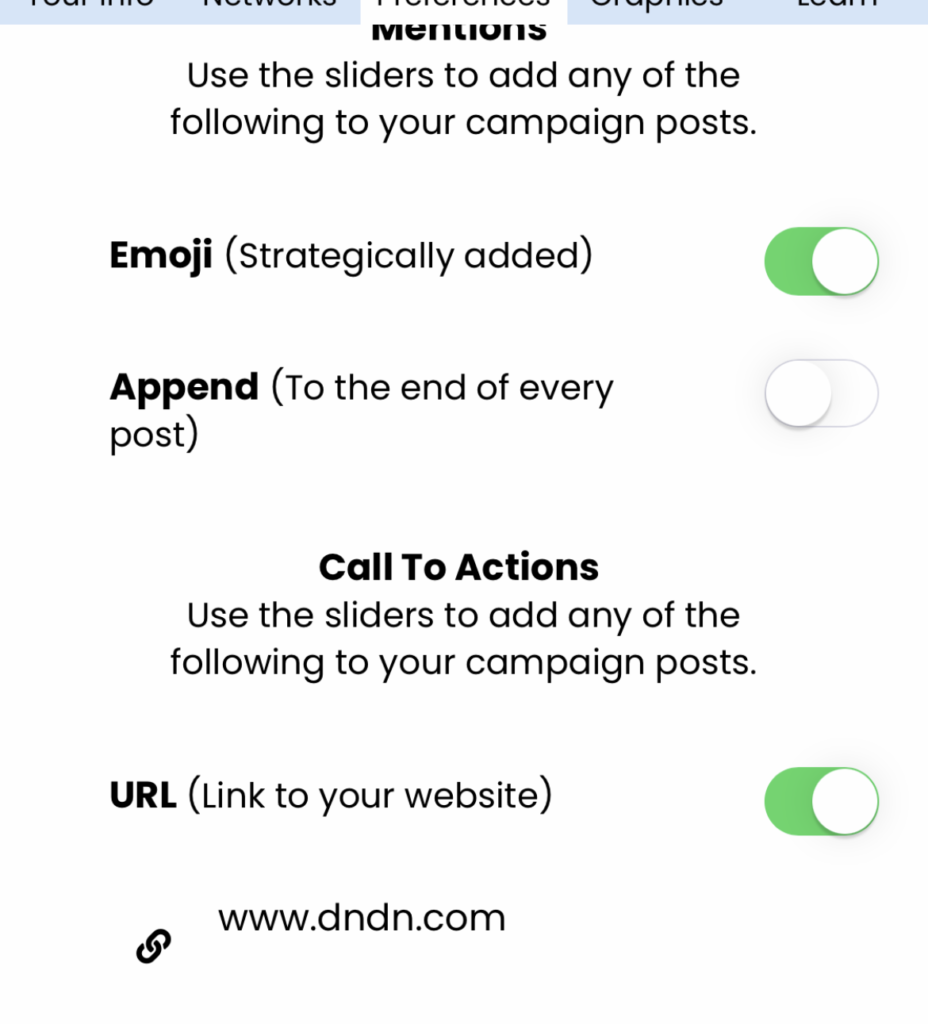
– Emoji: Control if AIMI strategically adds emoji in your post. If you turn this off, you will have to add any emojis to each post manually.
– Append: When turned on, this allows you to add a custom piece of text that gets added to the end of every post and can be added to designs that AIMI creates. Perfect if you need to add compliance info to your posts or tagline. The best practices are to keep as short as possible, and a long append text can cause AIMI to have a hard time keeping your post under 280 characters for Twitter. You may see your default append text has already been added.
Call To Actions: (A call to action is an invitation for a user to take some desired action.)
– URL: This tells AIMI to use the following URL as your link for all posts and to call to action text she writes for the campaign. You may see your default URL has already been added.
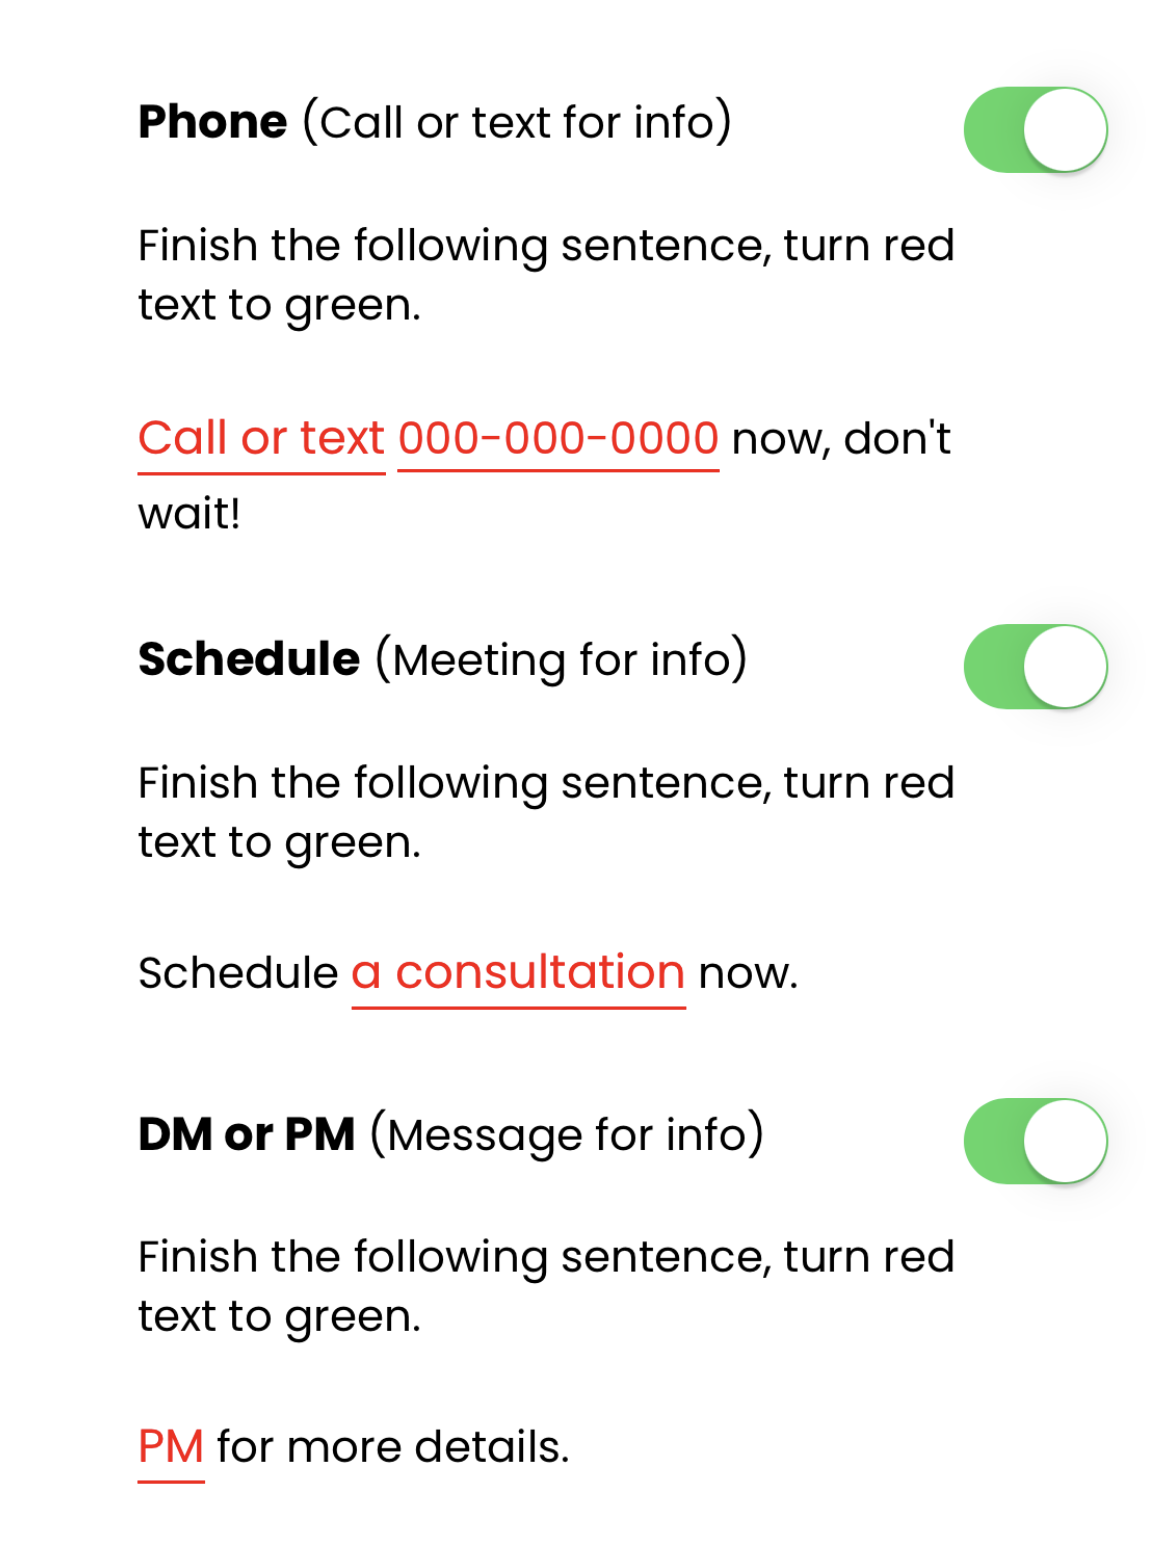
For Service-based businesses, we offer the following call to action you can use if needed.
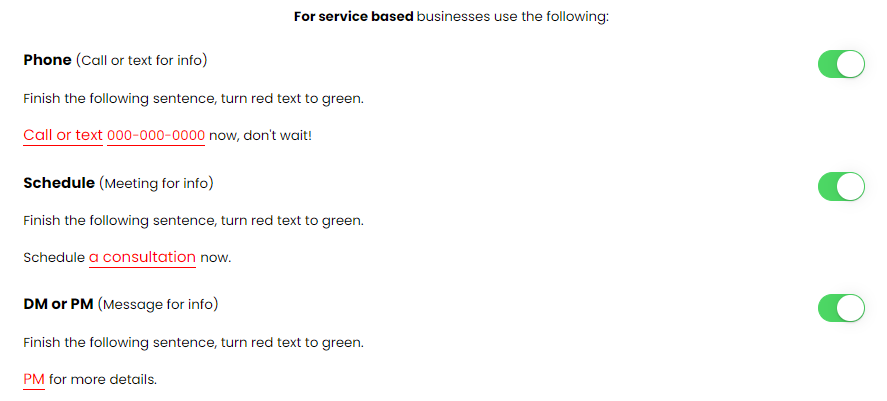
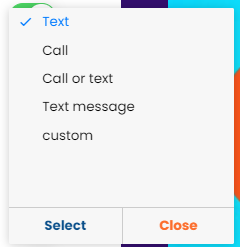
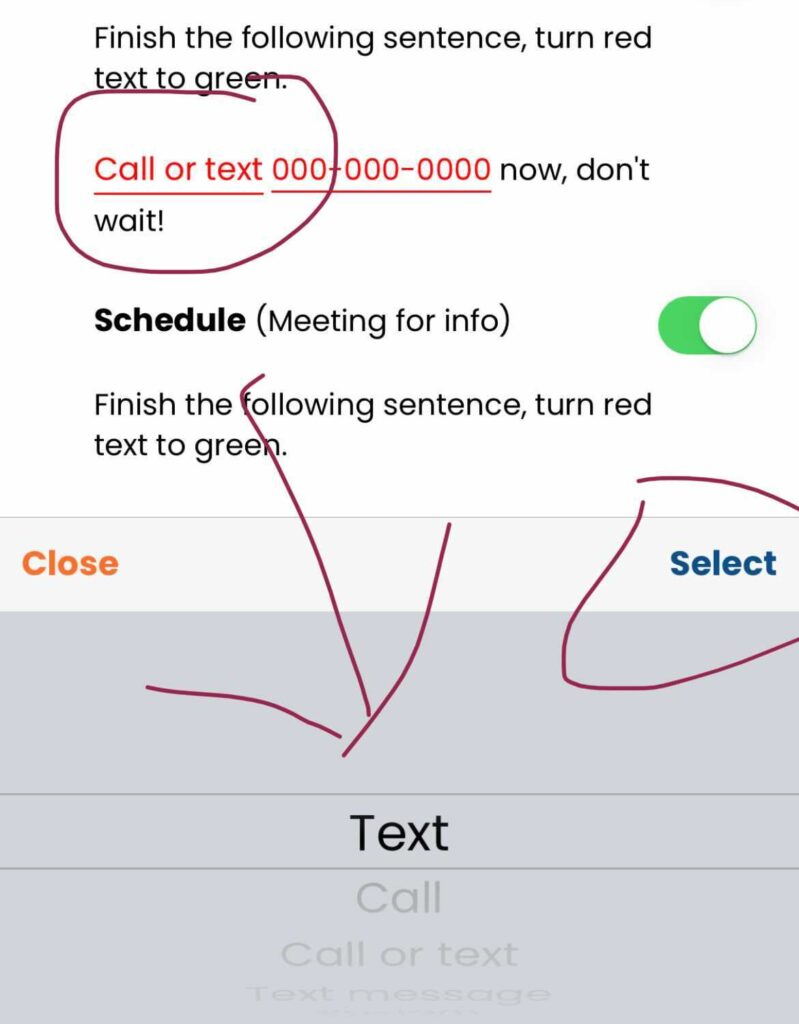
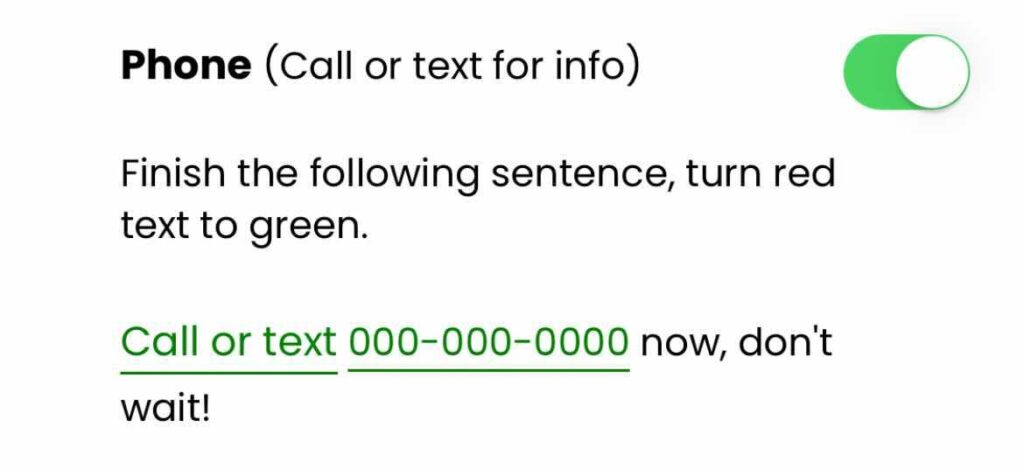
Once you turn “on” one of these options, AIMI provides a sample call-to-action you need to fill out. To do this, you need to turn the text from “red” to “green” to customize the sample. Some parts of the sample will load a text field for you to add your unique information, and others will open a drop-down menu for you to pick and option. Make sure to click select to lock in your menu selection.
Your all set once the text turns from red to green.

Hashtags:
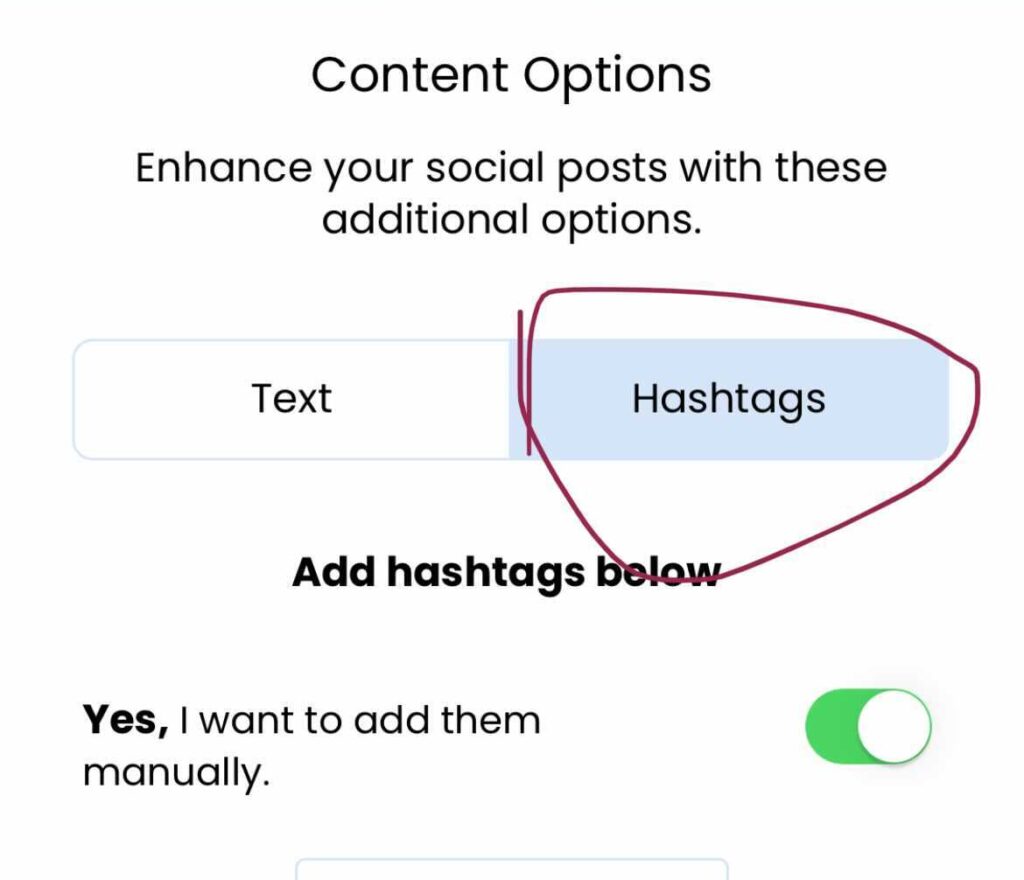
To add hashtags to use for the campaign click the “Hashtags” tab. You may see your default hashtags have already been added.
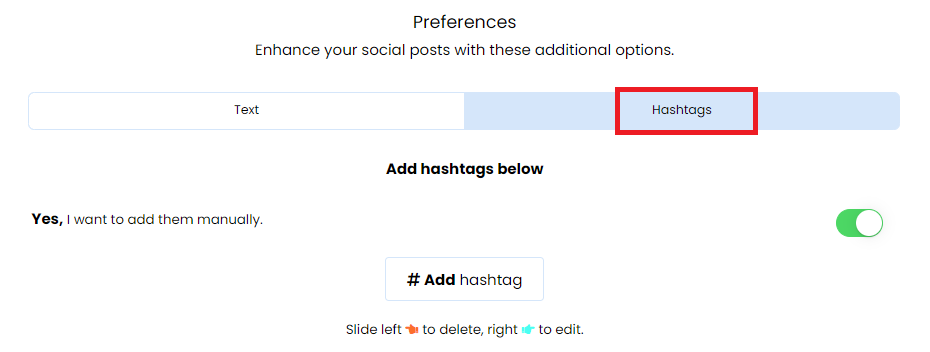
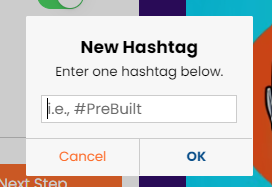
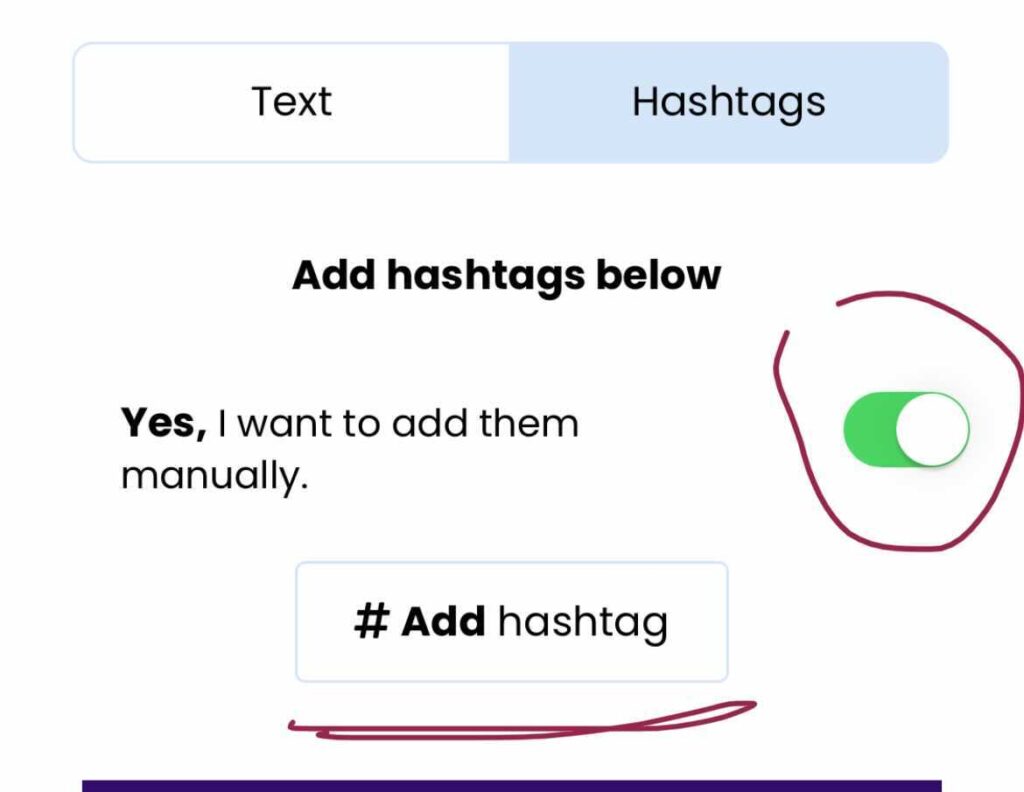
To add a new hashtag, turn on the option with the slider first. This will open the section to add hashtags. Next, click the button “Add hashtag.”

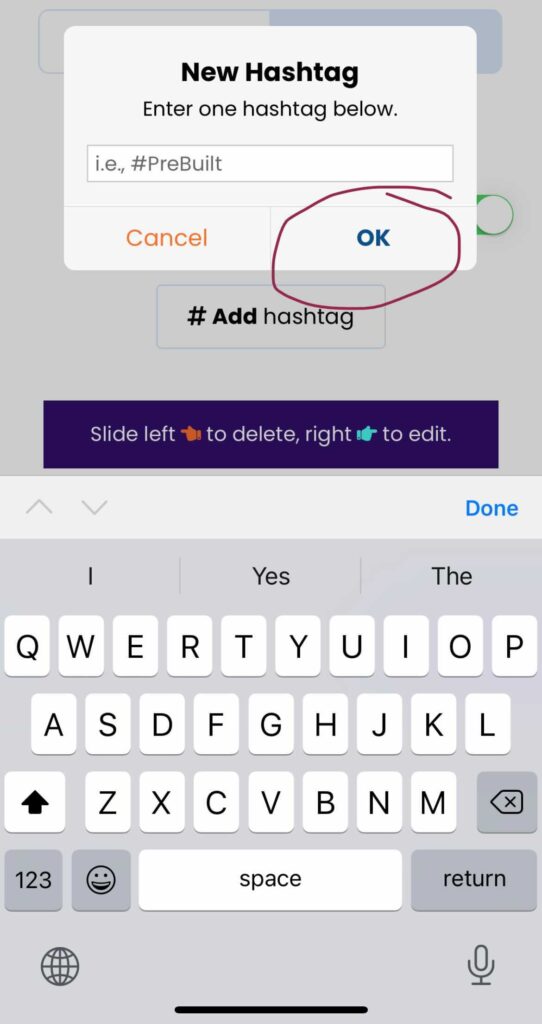
Next, a pop-up window will appear to type your hashtag into the text field. Click “Ok” to add it.
Edit or Remove a Hashtag
Your hashtags will appear as an entry into the table.
To update, slide your mouse to the right next to the hashtag entry you want to edit.

To delete, slide your mouse to the left next to the hashtag entry you want to delete. Click on the delete button to confirm.

Next Step: Step# 3 Learn – Campaign Editor
In this step, you can adjust the content options for AIMI to use in the campaign.
Mentions:
To use any of the options found on this page use your finger to slide the switch “On” green or “Off” gray.
Every category can have custom mention options depending on the marketing category you selected.
Default Mentions:
– Emoji: Control if AIMI strategically adds emoji in your post. If you turn this off, you will have to add any emojis to each post manually.
– Append: When turned on, this allows you to add a custom piece of text that gets added to the end of every post and can be added to designs that AIMI creates. Perfect if you need to add compliance info to your posts or tagline. The best practices are to keep as short as possible, and a long append text can cause AIMI to have a hard time keeping your post under 280 characters for Twitter. You may see your default append text has already been added.
Call To Actions: (A call to action is an invitation for a user to take some desired action.)
– URL: This tells AIMI to use the following URL as your link for all posts and to call to action text she writes for the campaign. You may see your default URL has already been added.
For Service-based businesses, we offer the following call to action you can use if needed.
Once you turn “on” one of these options, AIMI provides a sample call-to-action you need to fill out. To do this, you need to turn the text from “red” to “green” to customize the sample. Some parts of the sample will load a text field for you to add your unique information, and others will open a drop-down menu for you to pick and option. Make sure to click select to lock in your menu selection.
Your all set once the text turns from red to green.
Hashtags:
To add hashtags to use for the campaign click the “Hashtags” tab. You may see your default hashtags have already been added.
To add a new hashtag, turn on the option with the slider first. This will open the section to add hashtags. Next, click the button “Add hashtag.”
Next, a pop-up window will appear to type your hashtag into the text field. Click “Ok” to add it.
Edit or Remove a Hashtag
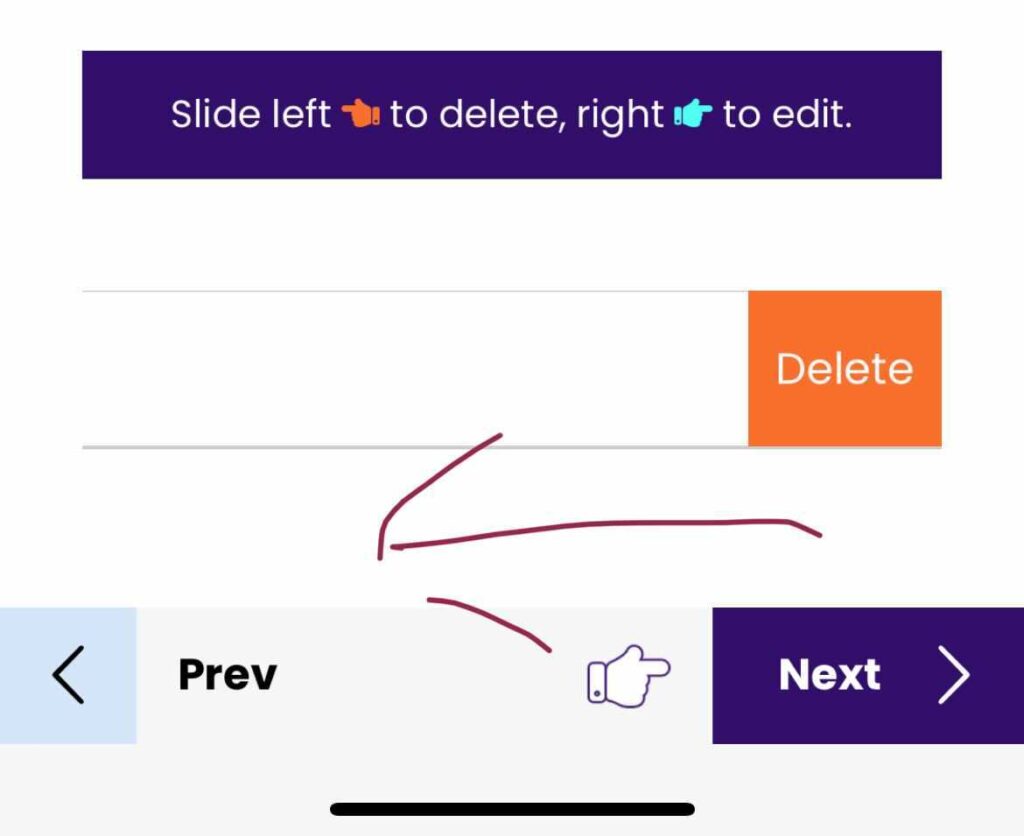
Your hashtags will appear as an entry into the table.
To update, slide your finger to the right next to the hashtag you want to edit.

To delete, slide your finger to the left next to the hashtag you want to delete. Click on the delete button to confirm.
Next Step: Step# 4 Learn – Campaign Editor